
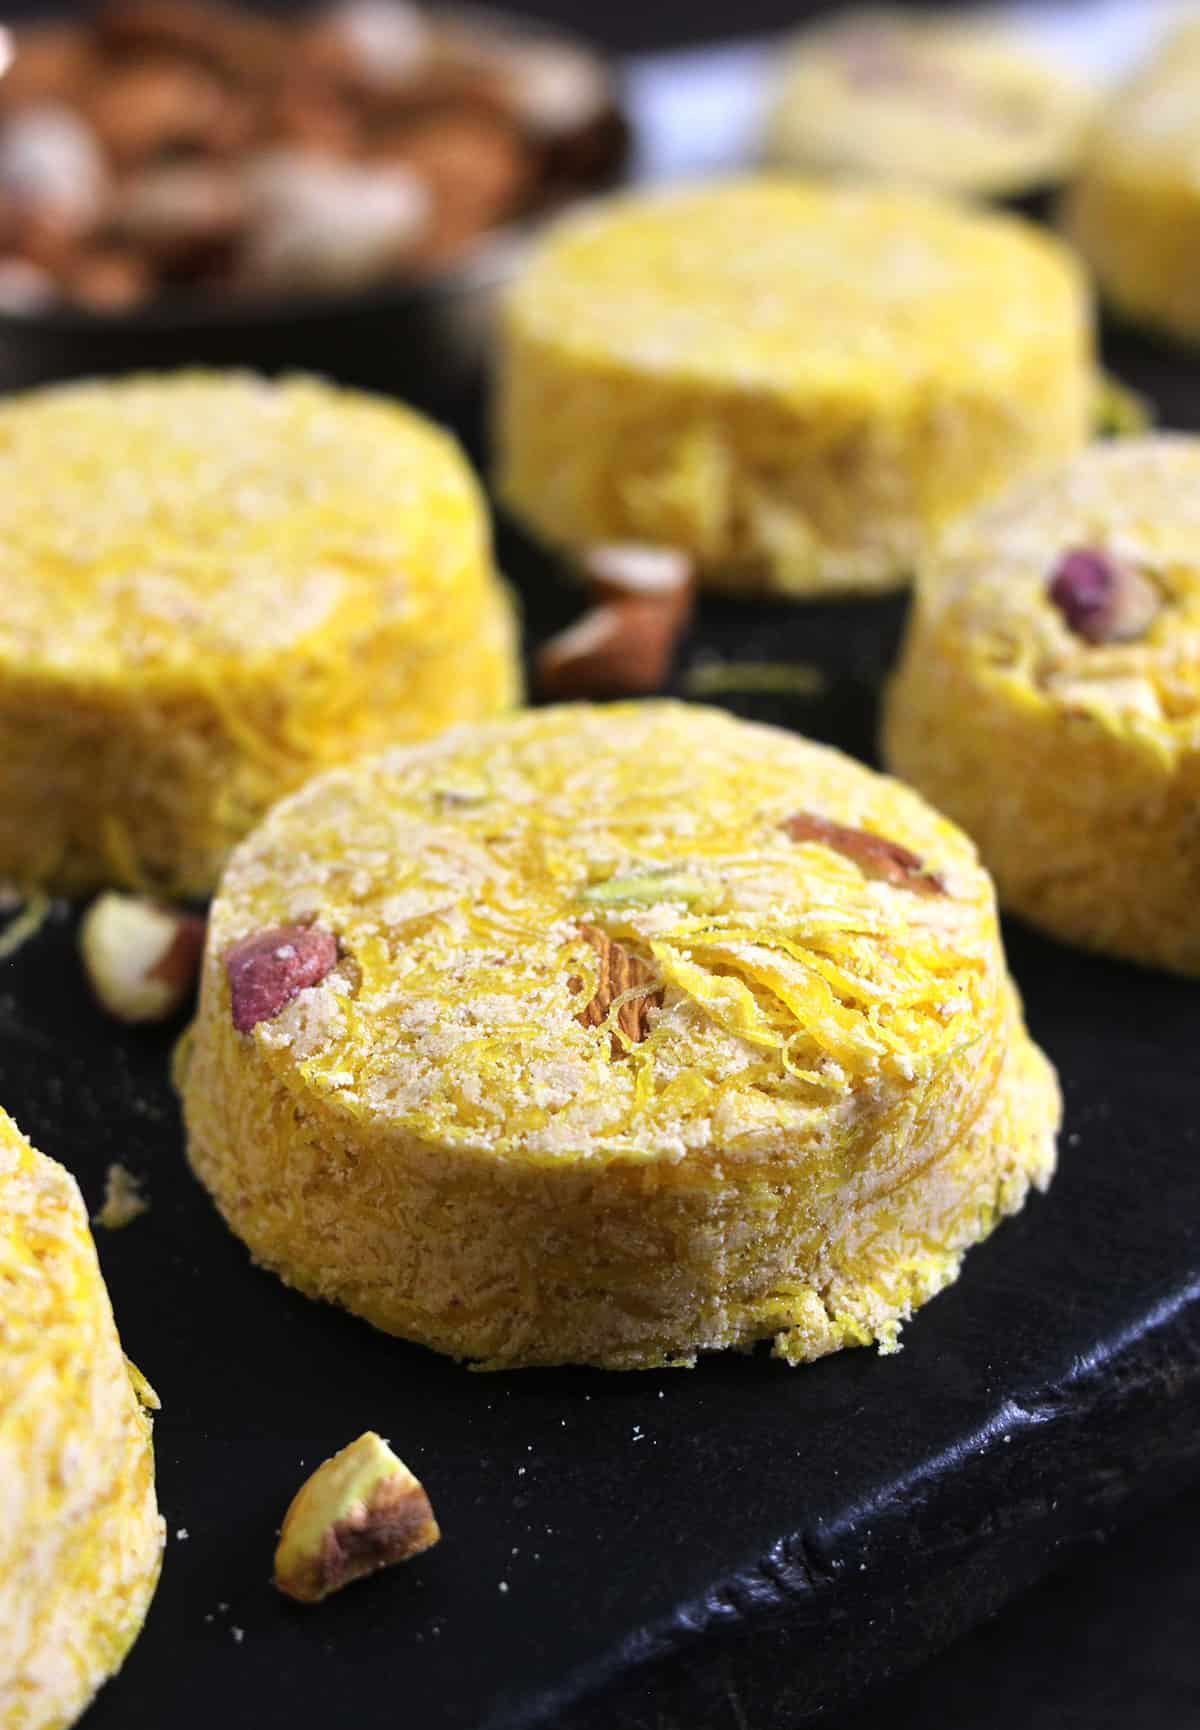
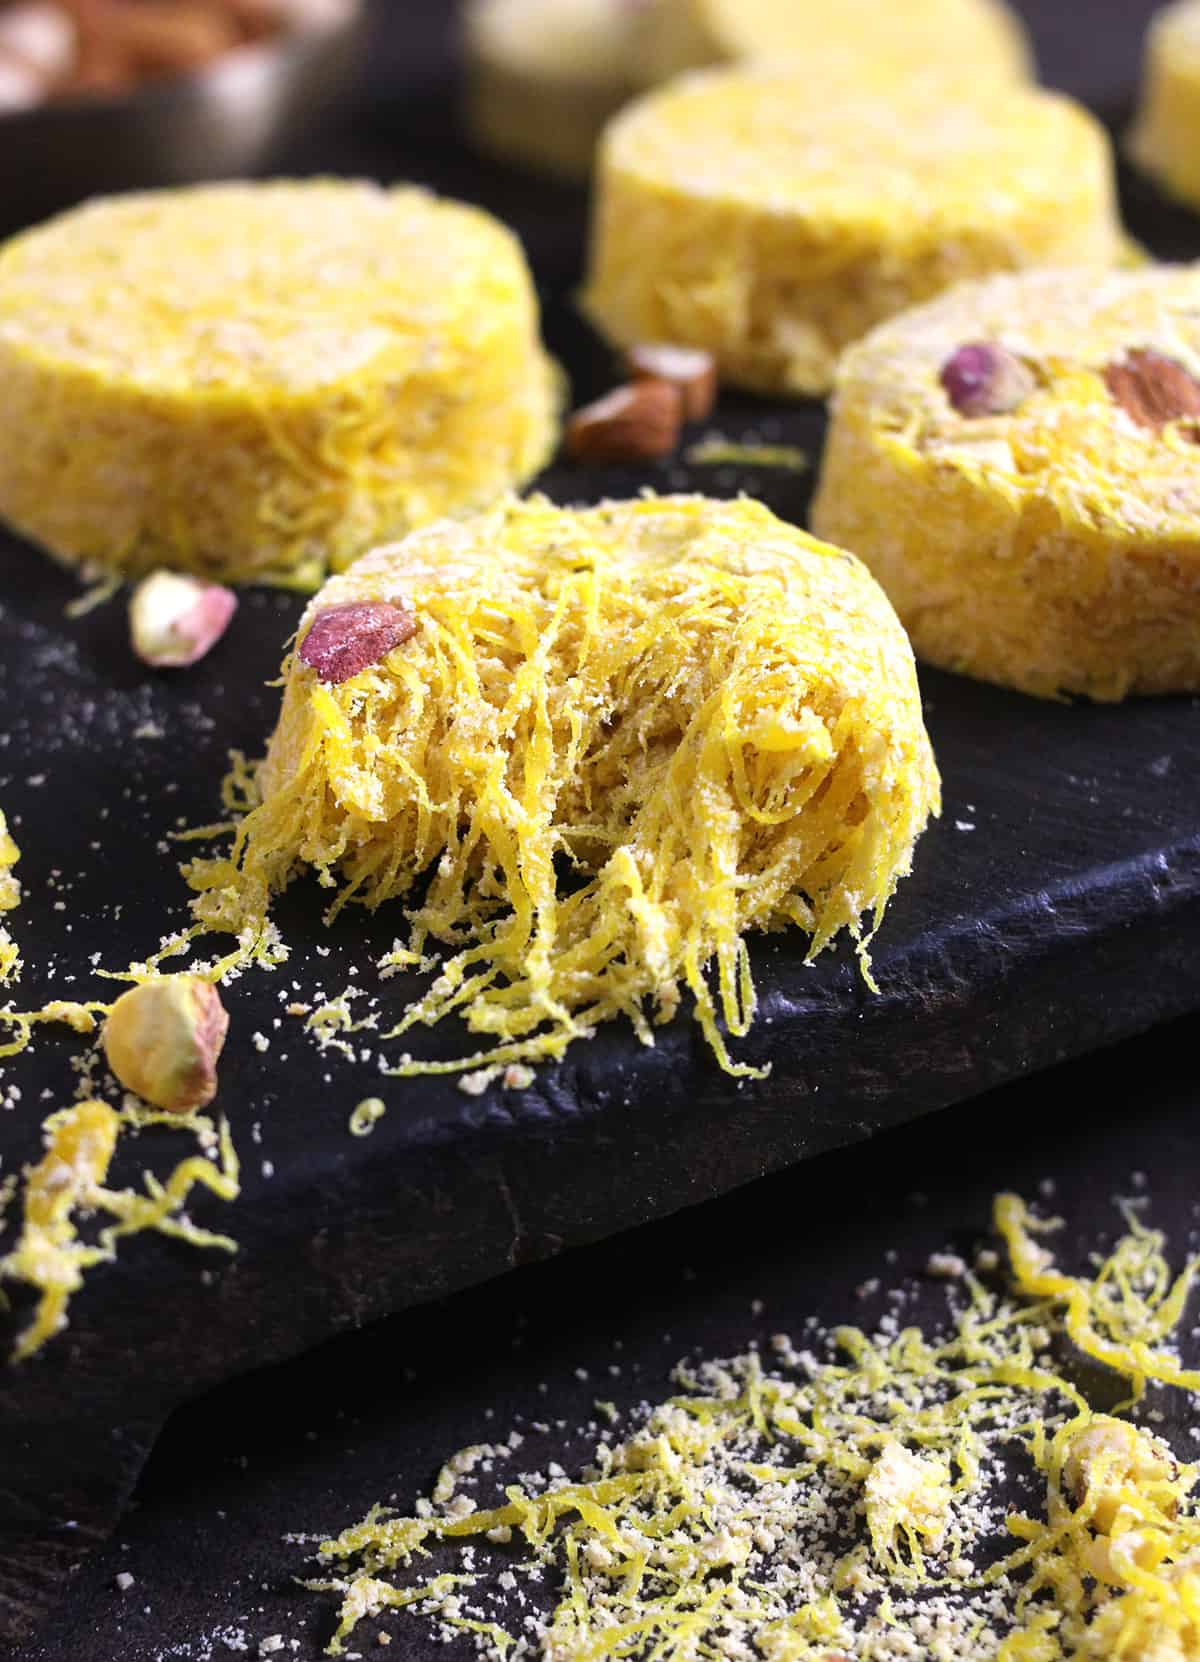
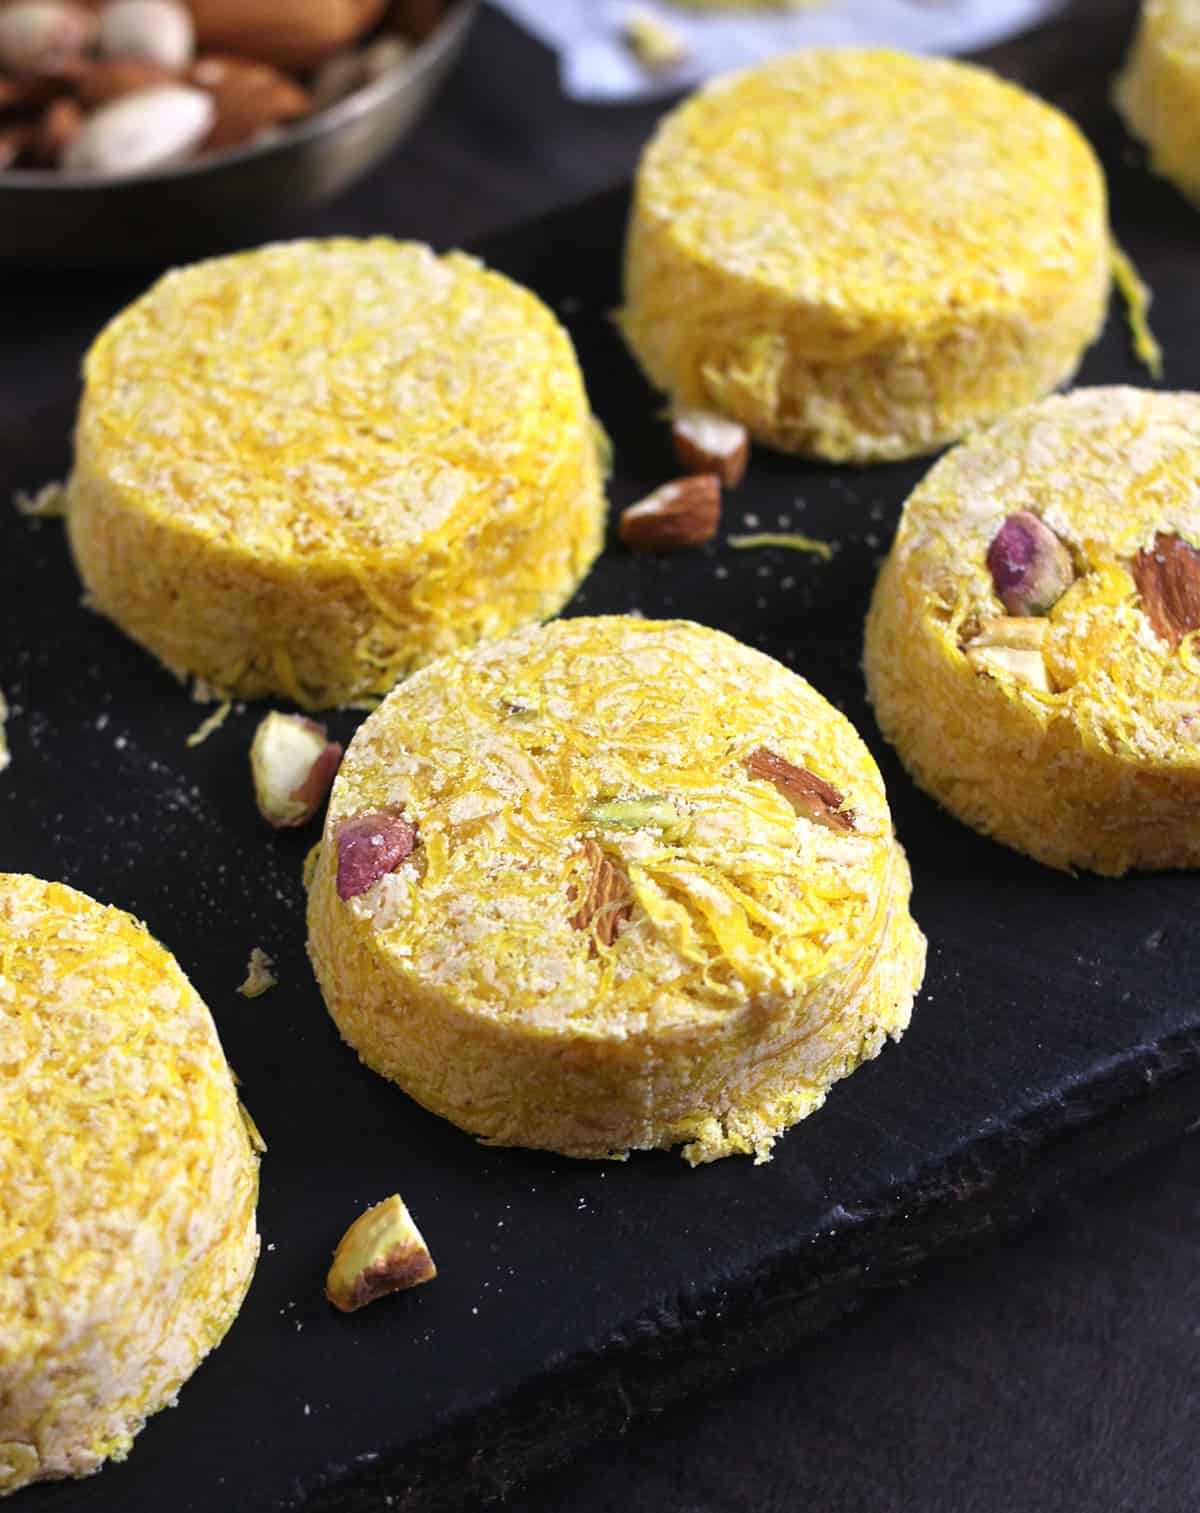
Pineapple Soan Papdi is a crispy and flaky, flavorful Indian dessert prepared using fresh pineapple juice along with sugar and flour.
What is Soan Papdi?
Soan Papdi is an Indian dessert made of flour (a combination of chickpea and all-purpose flour), sugar, and aromatic spices like cardamom or saffron. This pineapple soan papdi is a variation of the traditional recipe with additional ingredients like pineapple juice and essence.
Soan papdi is derived from the word sohan, which is usually cube-shaped or, in some places, also served as flakes. This is also called san papri, shompapri, sohan papdi, shonpapdi or patisa.
If you are following my blog, you will know about the traditional soan papdi that I made as a gift box item last year for Diwali.
Subscribe Below to Receive Free Meal Plans Every Week
Sign up for our newsletter to receive our weekly meal plans directly in your inbox!
Soan papdi is a perfect addition for any festival, from Diwali, Holi, Raksha Bandhan, Christmas, and to special occasions like weddings, birthdays, and anniversaries.
I love soan papdi so much that this was also one item in my wedding sweet box that was distributed to all guests along with Kaju Barfi, Dry Fruit Chikki, Halwa, Masala cashews, etc.
Even before you start making soan papdi, I highly recommend you watch this beautiful video so you know how exactly it is prepared at home.
Ingredients
3 tablespoon Ghee
1 cup All purpose flour (Maida)
3 tablespoon Besan or Gram flour
For sugar syrup
1 cup Sugar
¼ cup Pineapple juice
⅛ teaspoon Yellow color
Juice of ½ lemon
½ teaspoon Pineapple essence
¼ teaspoon Cardamom powder
Nuts for garnish, optional.
How to make Pineapple Soan Papdi
The steps are all the same as that of traditional soan papdi. The only difference is the addition of pineapple juice and essence while making sugar syrup.
Roasting Flour & Besan
In a pan, heat 2 tablespoon of ghee on medium flame. Now add besan (chickpea flour) and maida (all-purpose flour) and mix so that there are no lumps.
Now add the remaining 1 tablespoon of ghee and continue to saute the flour on medium flame so that the mixture becomes aromatic.
Roasting of flours is a very important step that will be key for the end result, so do not rush. Keep stirring to avoid it from burning at the bottom. It took 8 to 10 minutes to complete the roasting of the flours. The time required by you may vary depending on the intensity of the flame and pan thickness.
Transfer this mixture to a large plate/bowl by passing it through a sieve, and keep it aside. Check out the video here.
Making Sugar Syrup
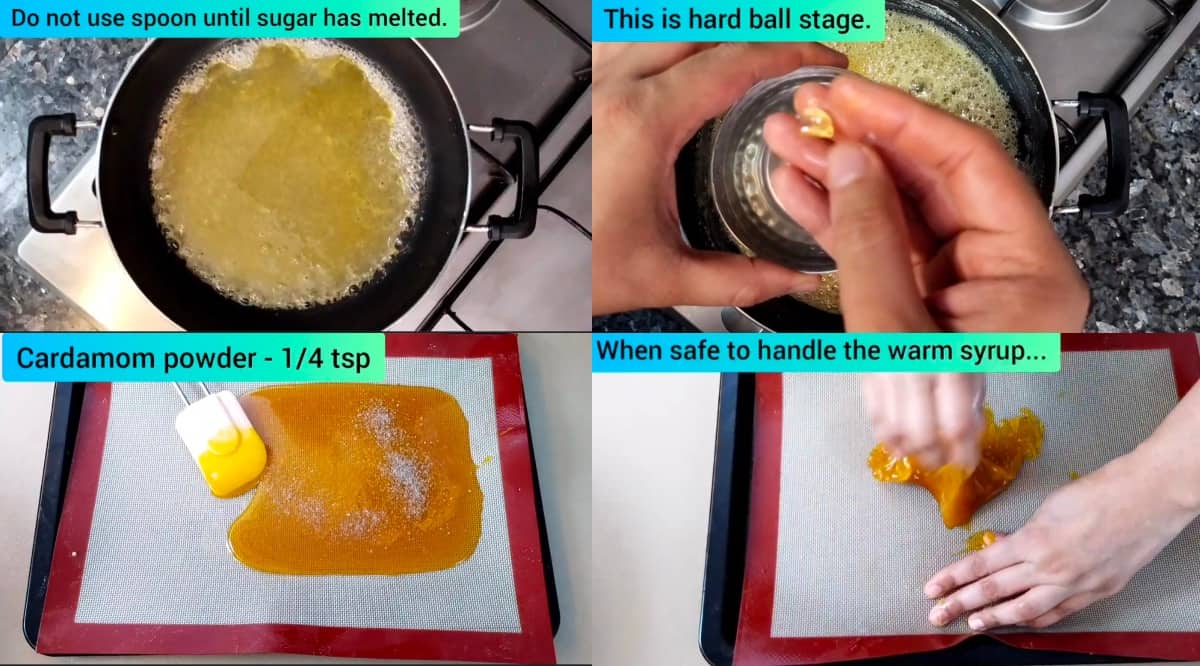
Add sugar, pineapple juice, and lemon juice in a pan and cook on low flame till the sugar has melted and turns into light golden (amber) color with a hard ball consistency. Do not add any spoon or spatula until the sugar has dissolved.
Keep a small bowl with water handy. Add a few drops of the syrup at different stages to check for hardball consistency. I have shown each stage in the video for a better understanding.
The flame should be medium-low throughout. It may take between 20 to 25 minutes to reach the final stage. Again make sure you don't rush and make this only on medium-low flame. Check out the video here.
Add pineapple essence and food color, and mix. Switch off the flame.
Making of Flaky Layers
Once the sugar syrup is ready, transfer it to a silicone mat or any steel plate greased with ghee. Sprinkle cardamom powder. Keep stirring this with a spatula so that its temperature comes down.
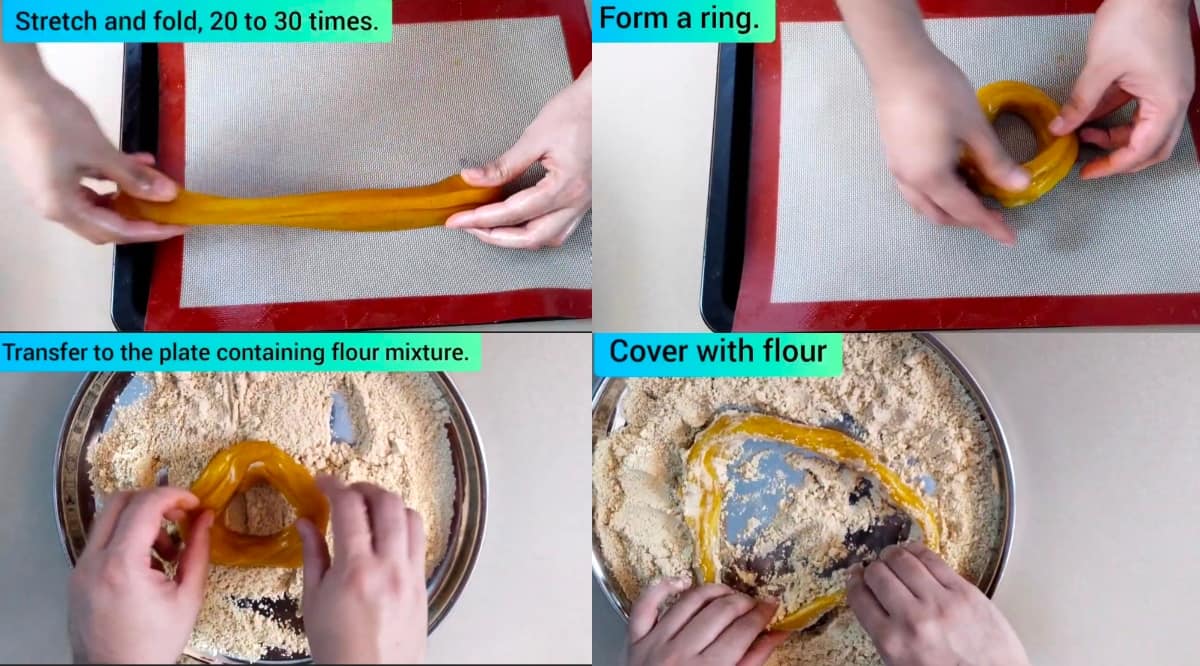
Grease your palms with ghee. Now stretch and fold the caramelized sugar into a log shape several times. I repeated this step 20 to 30 times. Check out the video here.
Now join the ends of the log to form a ring and place this in the plate containing the flour mixture. You will have to stretch the sugar ring, dredge it generously with the flour mixture, make an 8 shape, and then form a ring again.
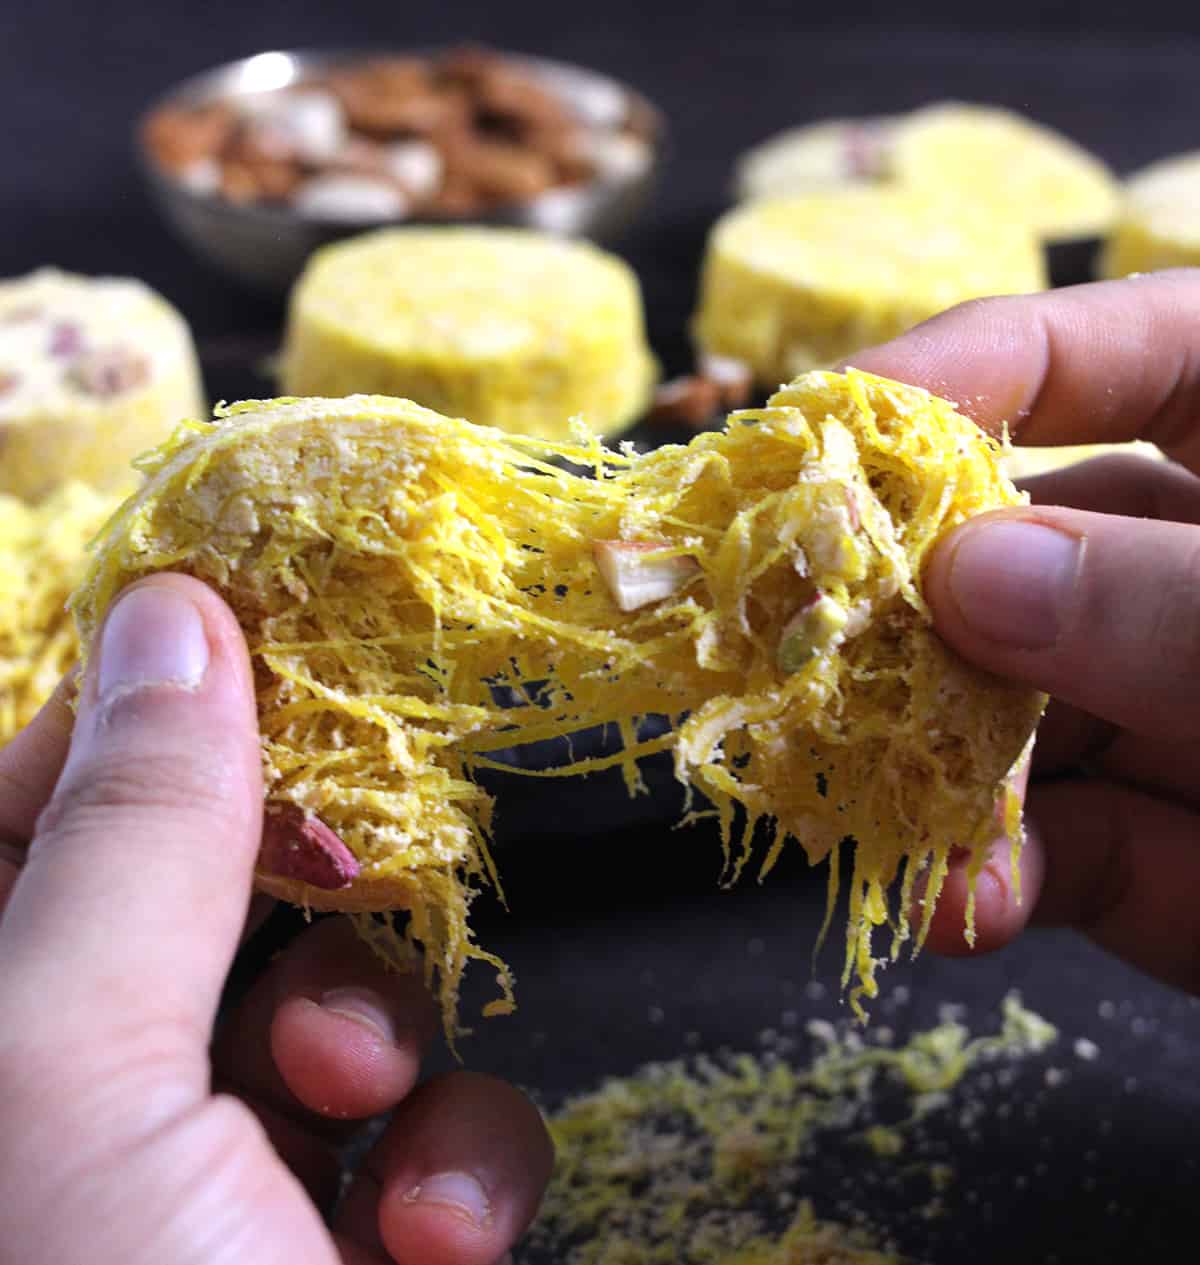
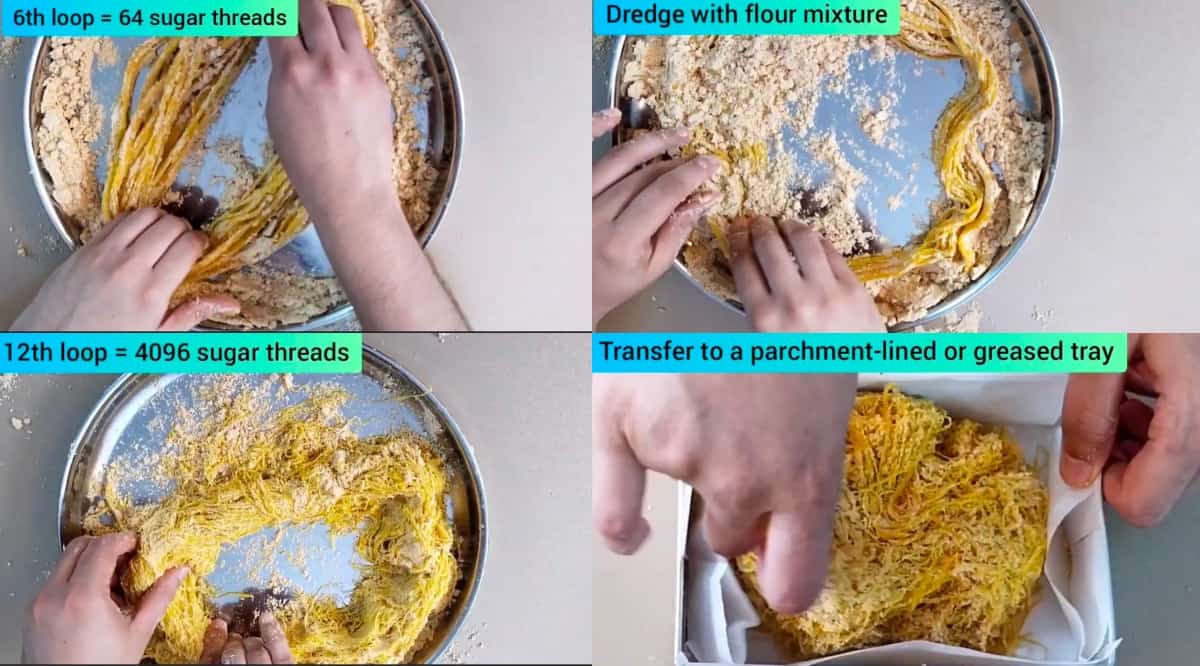
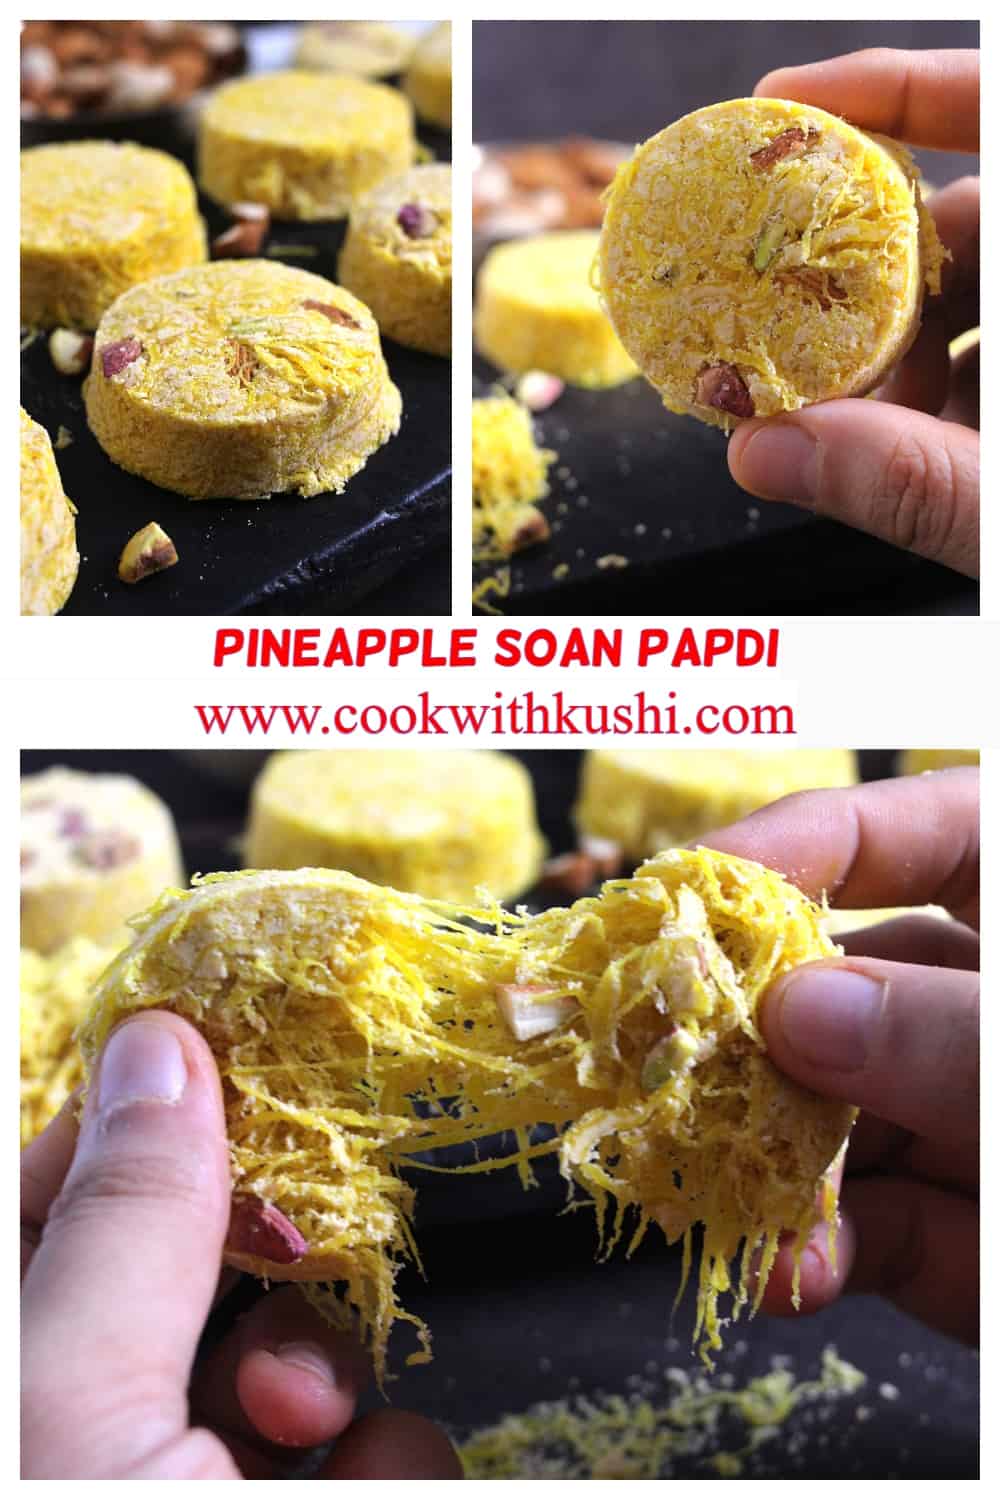
Gently stretch this ring, making sure it never breaks; dredge it with flour and keep repeating until almost all the flour is incorporated and thousands of sugar threads are formed. We start with one thick sugar thread. After the first loop (8 shape to ring), we will have two threads; after the second loop, we will have four threads.
Similarly, after the tenth loop, we will have 1024 threads. After the 12th loop, we will have 4096 threads, and so on. Amazing, isn't it? The pictures say it all! Basically, pull, dredge with flour, loop, and pull is what you have to do. For a better understanding, Check out the video here.
How to present Pineapple Soan Papdi?
You can transfer this whole mixture into a square pan and garnish it with nuts. Press gently using the back of a laddle or spatula. Later cut them into cubes.
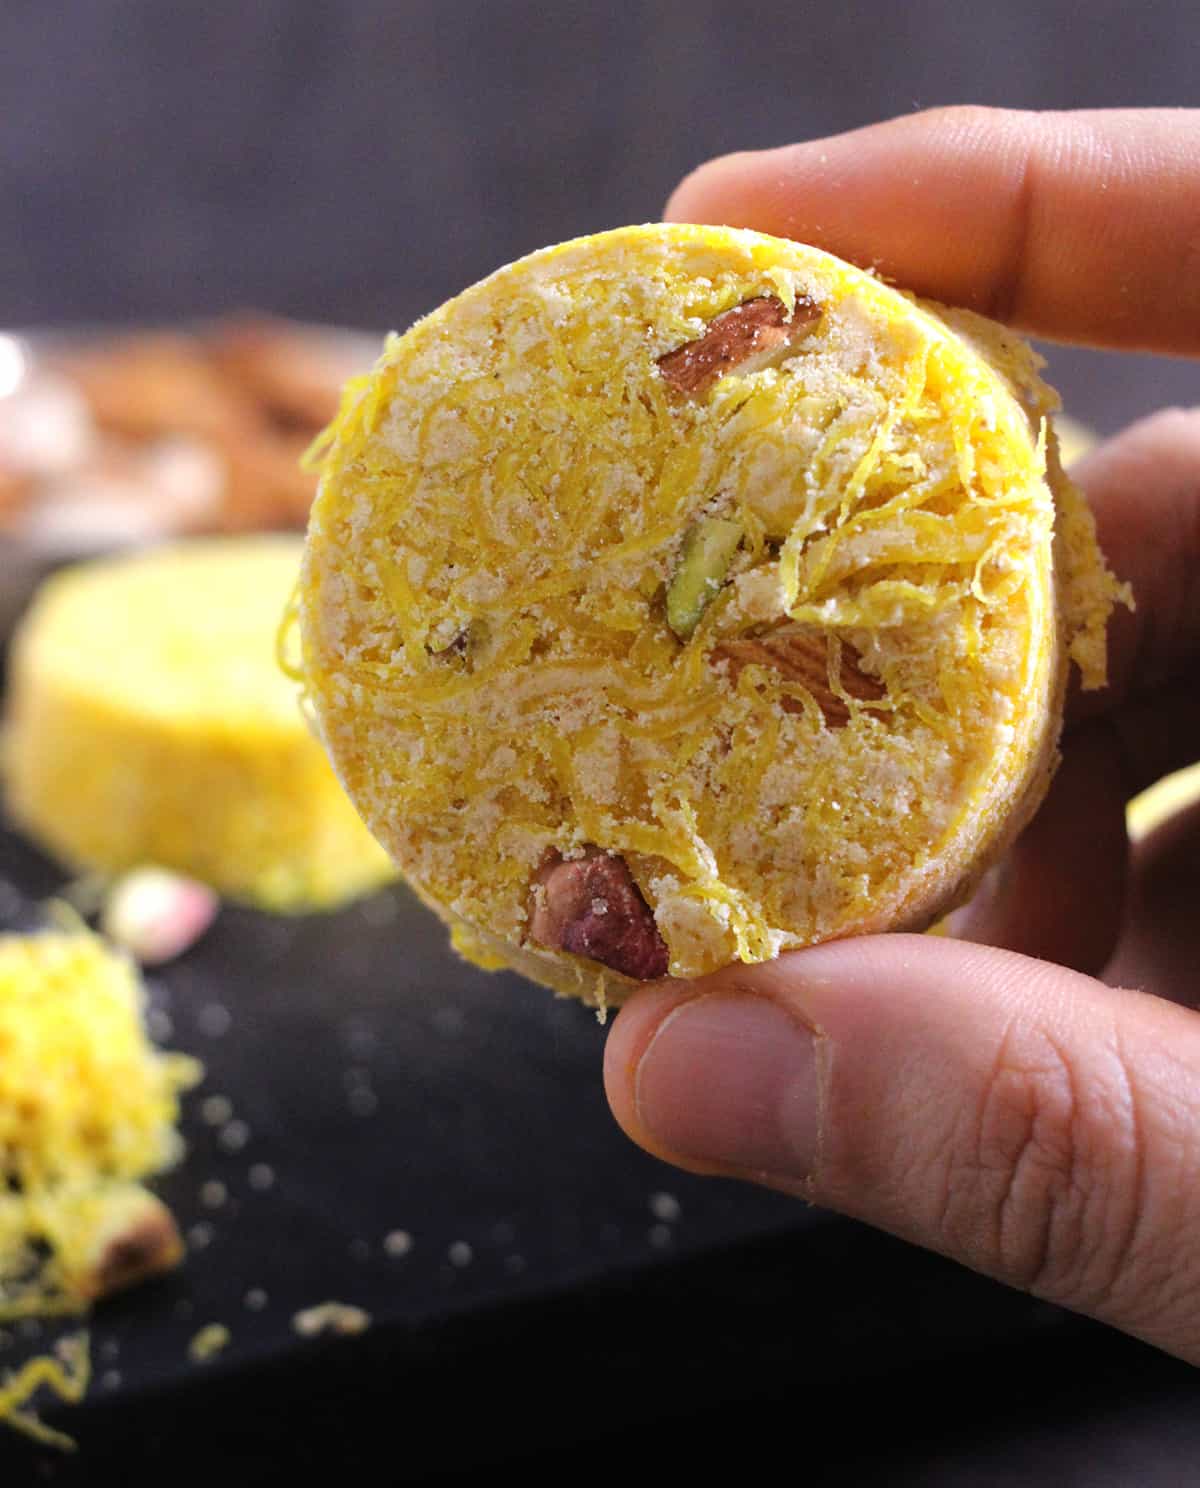
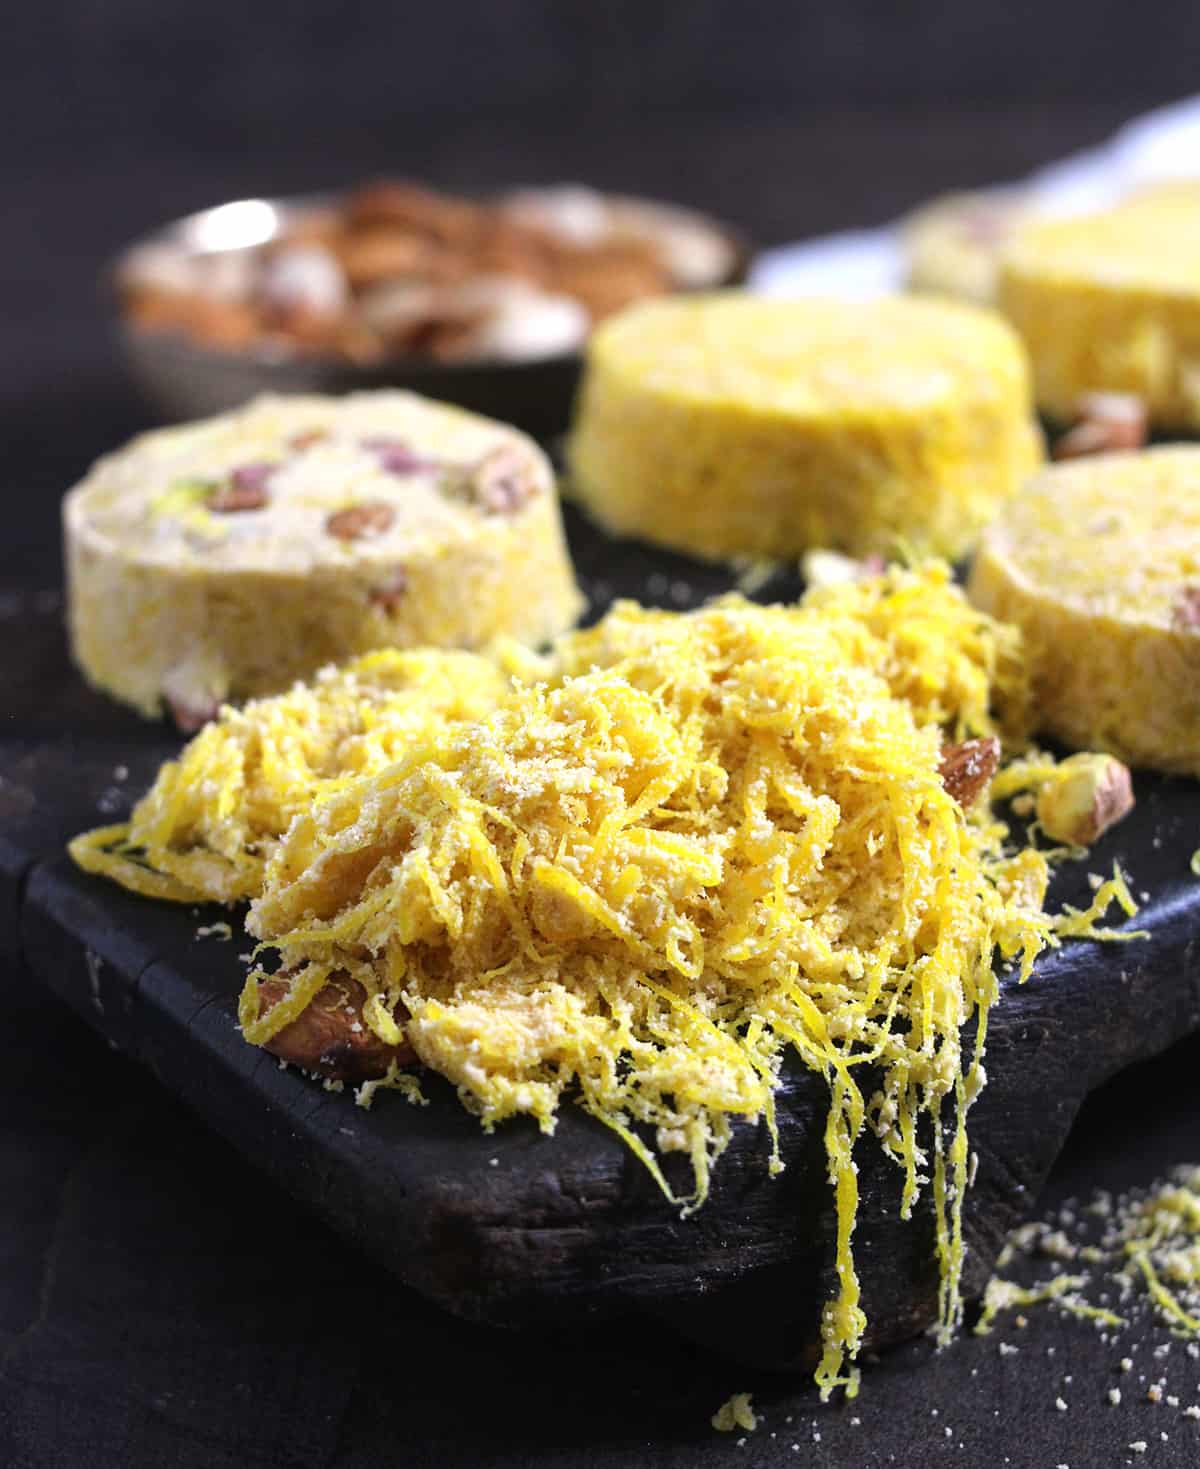
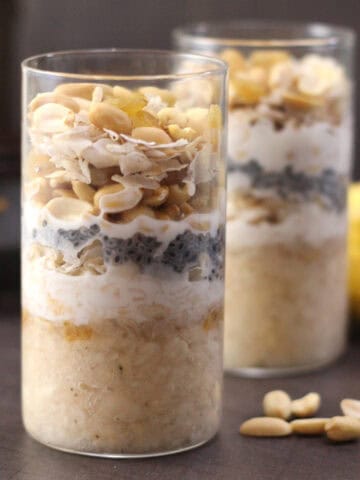
Alternatively, add chopped nuts and a small portion of the sugar threads prepared above in a glass bowl or ramekins and press gently with your finger. Flip it onto the serving plate.
Pro Tips
- While roasting flour and making sugar syrup keep in mind, the flame should be medium-low. This low flame setting will give you a successful result. Do not be in a rush, as you are already spending enough time, and you don't want your effort to go to waste.
- The sugar syrup is hot or warm to the touch when poured on a silicone mat but remember you cannot wait for it to cool. When it is still warm, you have to do the stretching. The more you pull when warm, the flakier will be your soan papadi. You can use heat-resistant gloves if needed.
Storage suggestions
I highly recommend you pack each one of them in a food-grade plastic sheet or butter paper. This will ensure that the pineapple soan papdis will remain fresh for a longer time at room temperature.
Never keep your soan papdi open in the air, as this will make it soft and sticky.
Video
You can check out the making of pineapple soan papdi here.
FAQ
To make soan papdi, you need all-purpose flour or maida, besan or chickpea flour, ghee, sugar, and a few aromatic spices like cardamom or saffron.
The ingredients used for both soan papdi and patisa are almost the same. Patisa is dense and darker in color, while soan papdi is soft with multiple flaky layers.
Recipe card
Pineapple Soan Papdi | How to make Soan Papdi | Special Diwali Sweet
Equipment
- 1 Pan
Ingredients
- 3 tablespoon Ghee
- 1 cup All purpose flour (Maida)
- 3 tablespoon Besan or Gram flour
For sugar syrup
- 1 cup Sugar
- ¼ cup Pineapple juice
- ⅛ teaspoon Yellow color
- Juice of ½ lemon
- ½ teaspoon Pineapple essence
- ¼ teaspoon Cardamom powder
- Nuts for garnish, optional.
Instructions
Roasting flour and besan
- In a pan, heat 2 tablespoon of ghee on medium flame. Now add besan (chickpea flour) and maida (all-purpose flour) and mix so that there are no lumps.3 tablespoon Ghee, 1 cup All purpose flour (Maida) , 3 tablespoon Besan or Gram flour
- Now add the remaining 1 tablespoon of ghee and continue to saute the flour on medium flame so that the mixture becomes aromatic.
- Roasting of flours is a very important step that will be key for the end result, so do not rush. Keep stirring to avoid it from burning at the bottom. It took 8 to 10 minutes to complete the roasting of the flours. The time required by you may vary depending on the intensity of the flame and pan thickness.
- Transfer this mixture to a large plate/bowl by passing it through a sieve, and keep it aside. Check out the video here.
Making Sugar Syrup
- Add sugar, pineapple juice, and lemon juice in a pan and cook on low flame till the sugar has melted and turns into light golden (amber) color with a hard ball consistency. Do not add any spoon or spatula until the sugar has dissolved.1 cup Sugar, ¼ cup Pineapple juice , Juice of ½ lemon
- Keep a small bowl with water handy. Add a few drops of the syrup at different stages to check for hardball consistency. I have shown each stage in the video for a better understanding.
- The flame should be medium-low throughout. It may take between 20 to 25 minutes to reach the final stage. Again make sure you don't rush and make this only on medium-low flame. Check out the video here.
- Add pineapple essence and food color, and mix. Switch off the flame.⅛ teaspoon Yellow color , ½ teaspoon Pineapple essence
Making of Flaky Layers
- Once the sugar syrup is ready, transfer it to a silicone mat or any steel plate greased with ghee. Sprinkle cardamom powder. Keep stirring this with a spatula so that its temperature comes down.¼ teaspoon Cardamom powder
- Grease your palms with ghee. Now stretch and fold the caramelized sugar into a log shape several times. I repeated this step 20 to 30 times. Check out the video here.
- Now join the ends of the log to form a ring and place this in the plate containing the flour mixture. You will have to stretch the sugar ring, dredge it generously with the flour mixture, make an 8 shape, and then form a ring again.
- Gently stretch this ring, making sure it never breaks; dredge it with flour and keep repeating until almost all the flour is incorporated and thousands of sugar threads are formed. We start with one thick sugar thread. After the first loop (8 shape to ring), we will have two threads; after the second loop, we will have four threads.
- Similarly, after the tenth loop, we will have 1024 threads. After the 12th loop, we will have 4096 threads, and so on. Amazing, isn't it? The pictures say it all! Basically, pull, dredge with flour, loop, and pull is what you have to do. For a better understanding, Check out the video here.
How to present soan papdi?
- You can transfer this whole mixture into a square pan and garnish it with nuts. Press gently using the back of a laddle or spatula. Later cut them into cubes.Nuts for garnish, optional.
- Alternatively, add chopped nuts and a small portion of the sugar threads prepared above in a glass bowl or ramekins and press gently with your finger. Flip it onto the serving plate.
Notes
- While roasting flour and making sugar syrup keep in mind, the flame should be medium-low. This low flame setting will give you a successful result. Do not be in a rush, as you are already spending enough time, and you don't want your effort to go to waste.
- The sugar syrup is hot or warm to the touch when poured on a silicone mat but remember you cannot wait for it to cool. When it is still warm, you have to do the stretching. The more you pull when warm, the flakier will be your soan papadi. You can use heat-resistant gloves if needed.
Nutrition
For more recent updates, follow me on Pinterest, Instagram, Twitter
***Click below to save it on Pinterest***


Comments
No Comments